This tutorial will walk you through the creation of a simple Rich Internet Application with ThinWire using Eclipse 3.2 (Callisto) and the Eclipse Web Tools (WTP). It will also show you how to use these tools to debug your ThinWire application.
NOTE: Neither Eclipse nor the WTP plugins are necessary for ThinWire development. There are also other methods of using Eclipse to debug your ThinWire application that don’t require the WTP, but this currently appears to be the most straight-forward approach.
Configure the Development Environment
To follow this tutorial, you must have Eclipse 3.2 and the WTP installed with Apache Tomcat installed and configured. Below is a quick summary of the steps necessary. For more information see http://www.eclipse.org/webtools/.
- Download and Install Eclipes 3.2 (Callisto) from http://www.eclipse.org/downloads/
- Load Eclipse, Help –> Software Updates –> Find and Install…
- New Features –> Callisto Discovery Site
- Check “Web Standard Tools (WST)” and “J2EE Standard Tools”
- Click “Select Required”
- New Features –> Callisto Discovery Site
- Download & Extract Apache Tomcat from http://tomcat.apache.org/download-55.cgi
- In Eclipse, Window –> Preferences
- Server –> Installed Runtime Environments
- Click Add
- Choose Apache –> Apache Tomcat v5.5
- Click Next
- Set Tomcat Installation Directory to the location you extracted the Tomcat archive
- Click Finish
- Server –> Installed Runtime Environments
- Switch to the J2EE Perspective
- Window –> Show View –> Servers
- Right-Click –> New –> Sever
- Hostname = localhost
- Server Type = Apache –> Tomcat v5.5 Server
- Runtime = Apache Tomcat v5.5
- Click Finish
Create a ThinWire Project
Once you have Eclipse installed and configured, you can create your new project. Open Eclipse and switch to the J2EE Perspective. Then right-click on the Project Explorer and select New –> Project.

Choose Web –> Dynamic Web Project and click Next.

Set the project name to SimpleApp and make sure the Target Runtime is the Apache Tomcat that you set up in the configuration. Click Finish. Eclipse will create the project for you. If this is your first web project, you may have to accept a license agreement.

If you haven’t already done so, download the ThinWire SDK from http://www.thinwire.com/download.html. Extract the zip archive, and copy the tree JAR files from demos/playground/WEB-INF/lib (thinwire.jar, retroweaver-rt.jar, commons-fileupload-1.0.jar) to $ECLIPSE_WORKSPACE/SimpleApp/WebContent/WEB-INF/lib (where $ECLIPSE_WORKSPACE is the path of your Eclipse Workspace).

Back in Eclipse, right click on SimpleApp in the Project Explorer and choose Refresh. The three JAR files should now appear under Web App Libraries.
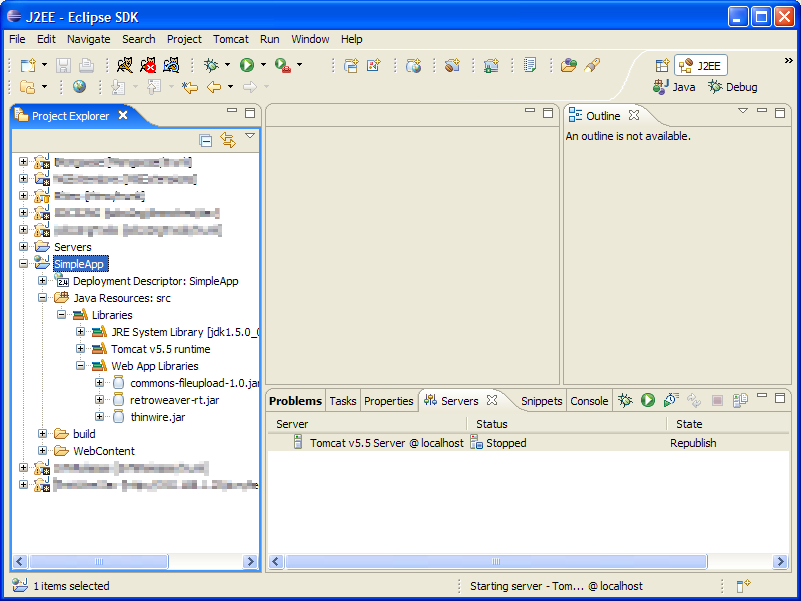
At this point you should have a Dynamic Web Application Project with the ThinWire Runtime and support libraries. Let’s write some code.
Creating the ThinWire Application
Right-click on Java Resources: src and choose New –> Package.

Make sure the Source folder points to SimpleApp/src and set the package name to thinwire.apps.simple. Click Finish. Right-click on the thinwire.apps.simple package and choose New –> Class.
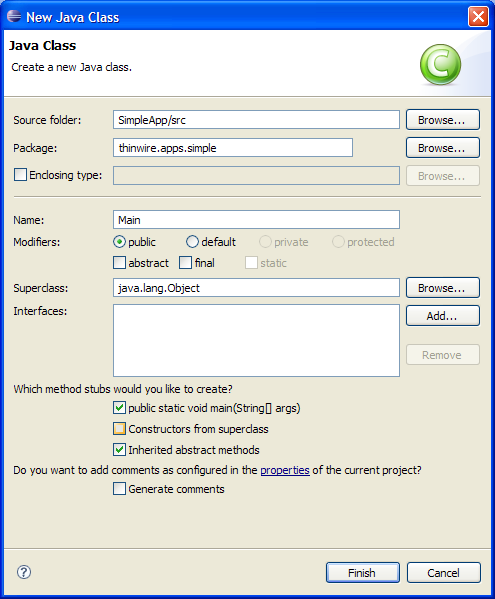
Make sure the Source folder and Package are correct. Call your new Class Main and check the box to create the public static void main(String[] args) method. Click Finish. Eclipse will generate the following java code in a file called Main.java:
package thinwire.apps.simple;

public class Main {

    /**
    * @param args
    */

    public static void main(String[] args) {

    // TODO Auto-generated method stub

    }
}
We’re going to create a simple application that presents the user with a Dialog asking for their name. When the user types their name anc clicks the OK button, the Dialog closes and another Dialog appears to greet the user by name.
The first thing we need to do is import the ThinWire UI Package and the ThinWire Event Package:
package thinwire.apps.simple;
import thinwire.ui.*;
import thinwire.ui.event.*;

public class Main {
The thinwire.ui package contains the classes for all of the user interface components provided by thinwire. ThinWire contains over 20 components, but for this application will will be using only Divider, Label, TextField, Button, and MessageBox. The thinwire.ui.event package contains the event listeners for the UI components. In this application we will be using an ActionListener with a Button.
The creation of a ThinWire web application is very straightforward and is very similar to creating a standard desktop application. Basically all we do is:
- Create new instances of Dialog, Label, TextField, and Button,
- Set the Text of the Label to somethin descriptive,
- Add an ActionListener to Button,
- Add the Label, TextField, and Button to the Dialog
- Display the Dialog
The code looks like this:
public static void main(String[] args) {
    final Dialog dialog = new Dialog("Simple ThinWire Application");

    // The position of the Dialog is relative to the browser
    dialog.setBounds(25, 25, 215, 210);
    Label label = new Label("Hello, what is your name?");

    // The position of the Label is relative to the Dialog
    label.setBounds(5, 5, 200, 25);

    // the Dialog and TextField are declared final so they can be
    // refereced inside the Button's ActionListener
    final TextField input = new TextField();
    input.setBounds(5, 35, 200, 25);

    Button button = new Button("OK");
    button.setBounds(55, 65, 100, 25);

    // When the button is clicked, close the dialog and greet the user
    button.addActionListener(Button.ACTION_CLICK, new ActionListener() {
        public void actionPerformed(ActionEvent ev) {
            dialog.setVisible(false);
            MessageBox.confirm("Hello " + input.getText() + "!");
        }

    });

    dialog.getChildren().add(label);
    dialog.getChildren().add(input);
    dialog.getChildren().add(button);

    dialog.setVisible(true);
}
Once you have finished typing your code, save the file.
Configuring the ThinWire WebServlet
Now, we need to configure the web app. In the Project Explorer, expand the Deployment Descriptor tree element. Right-click on Servlets and choose New –> Servlet.

Check the box next to Use existing Servlet class. Click Browse and choose WebServlet. Click Next.

Add two Initialization Parameters:
Param1 (the name of the class with the main method):
name = mainClass

value = thinwire.apps.simple.Main
Param2:
name = extraArguments

value = initParam,clientInfo,header
Select the only URL Mapping in the list, click Edit, and change it to “/” (without the quotes). Click Next.
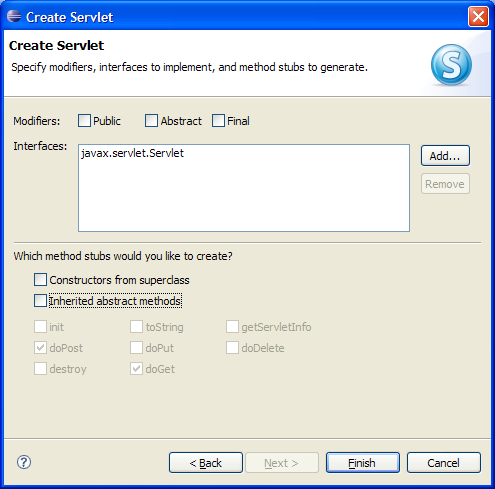
Uncheck all the boxes and click Finish.
Eclipse then writes this configuration information to WebContent/WEB-INF/web.xml. Your servlet is configured. Let’s run the app.
Run the Application
Right-click on SimpleApp in the Project Explorer and choose Run as –> Run on Server
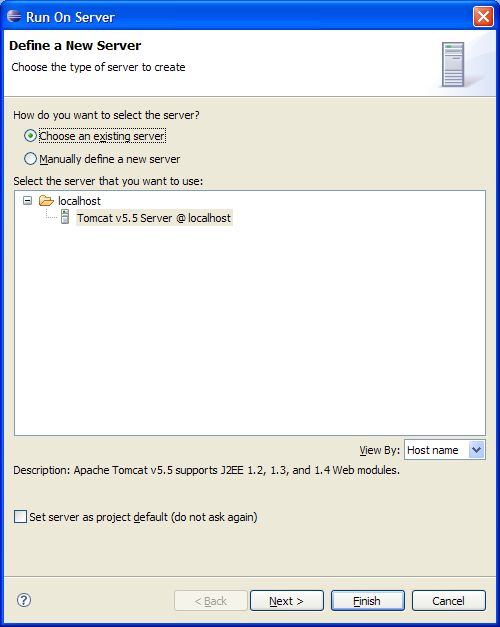
Make sure that the Tomcat server you configured is selected and click Finish. Eclipse then starts Tomcat and launches a browser pointed to your web app.
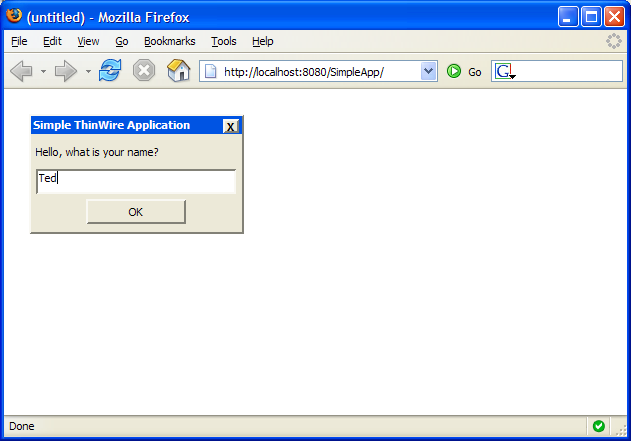
We have a Dialog with a Label, TextField, and Button. You can drag the Dialog around the screen if you like. Type your name in the TextField and click the Button.
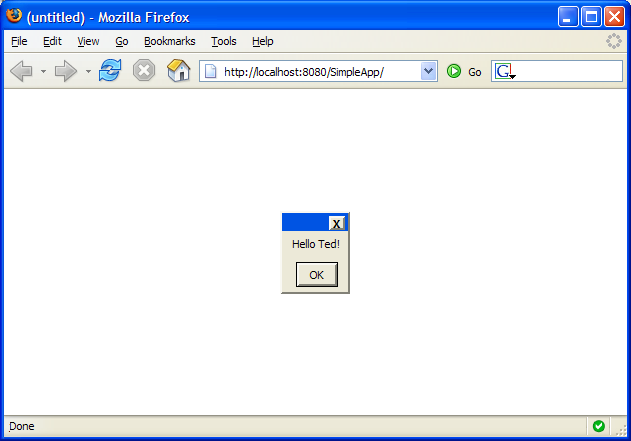
The MessageBox component functions like a JavaScript alert (although you can do more with a MessageBox such as include an image, display multiple buttons, and include any ThinWire component). When you click OK, the MessageBox closes and the app is done. Back in Eclipse, right-click on the Tomcat Server and choose Stop.
Debug the Application
This is a very simple application, but in the case of more complex web applications, you may need some assistance in debugging your code. Since a ThinWire application is written in pure Java, we can fully utilize Eclipse’s built in debugger.
In the code editor pane, find the first line of code that executes in the main method, and double-click in the left margin. A blue dot appears in the margin indicating a break point has been inserted. Now, right click on SimpleApp in the Project Explorer and choose Debug as –> Debug on Server. Click finish. Again Tomcat starts and the browser is launched. This time, Eclipse comes back into focus in the debug perspective. You may now step through the execution of your app as you watch the variables change.
When you’re done debugging, close your browser and stop the server.
Export the Application as a WAR archive
There’s only one more thing left to do: deploy the application. Eclipse WDP makes this extremely easy. Just right-click on SimpleApp in the Project Explorer and choose Export –> WAR file.
Choose a name for your WAR file and Eclipse will create the archive ready to be deployed onto any Java Servlet Container.
This is just one method for creating ThinWire Rich Internet Applications. We took advantage of several advanced features of the Eclipse Web Tools Project, but really the only things a developer needs to create a ThinWire application are the ThinWire library JAR files, a Java complier, and a text editor. The only thing you need to run a ThinWire application is a Java servlet container. With ThinWire, creating Rich Internet Applications are as simple as creating desktop GUI applications.

